PHANANDCO
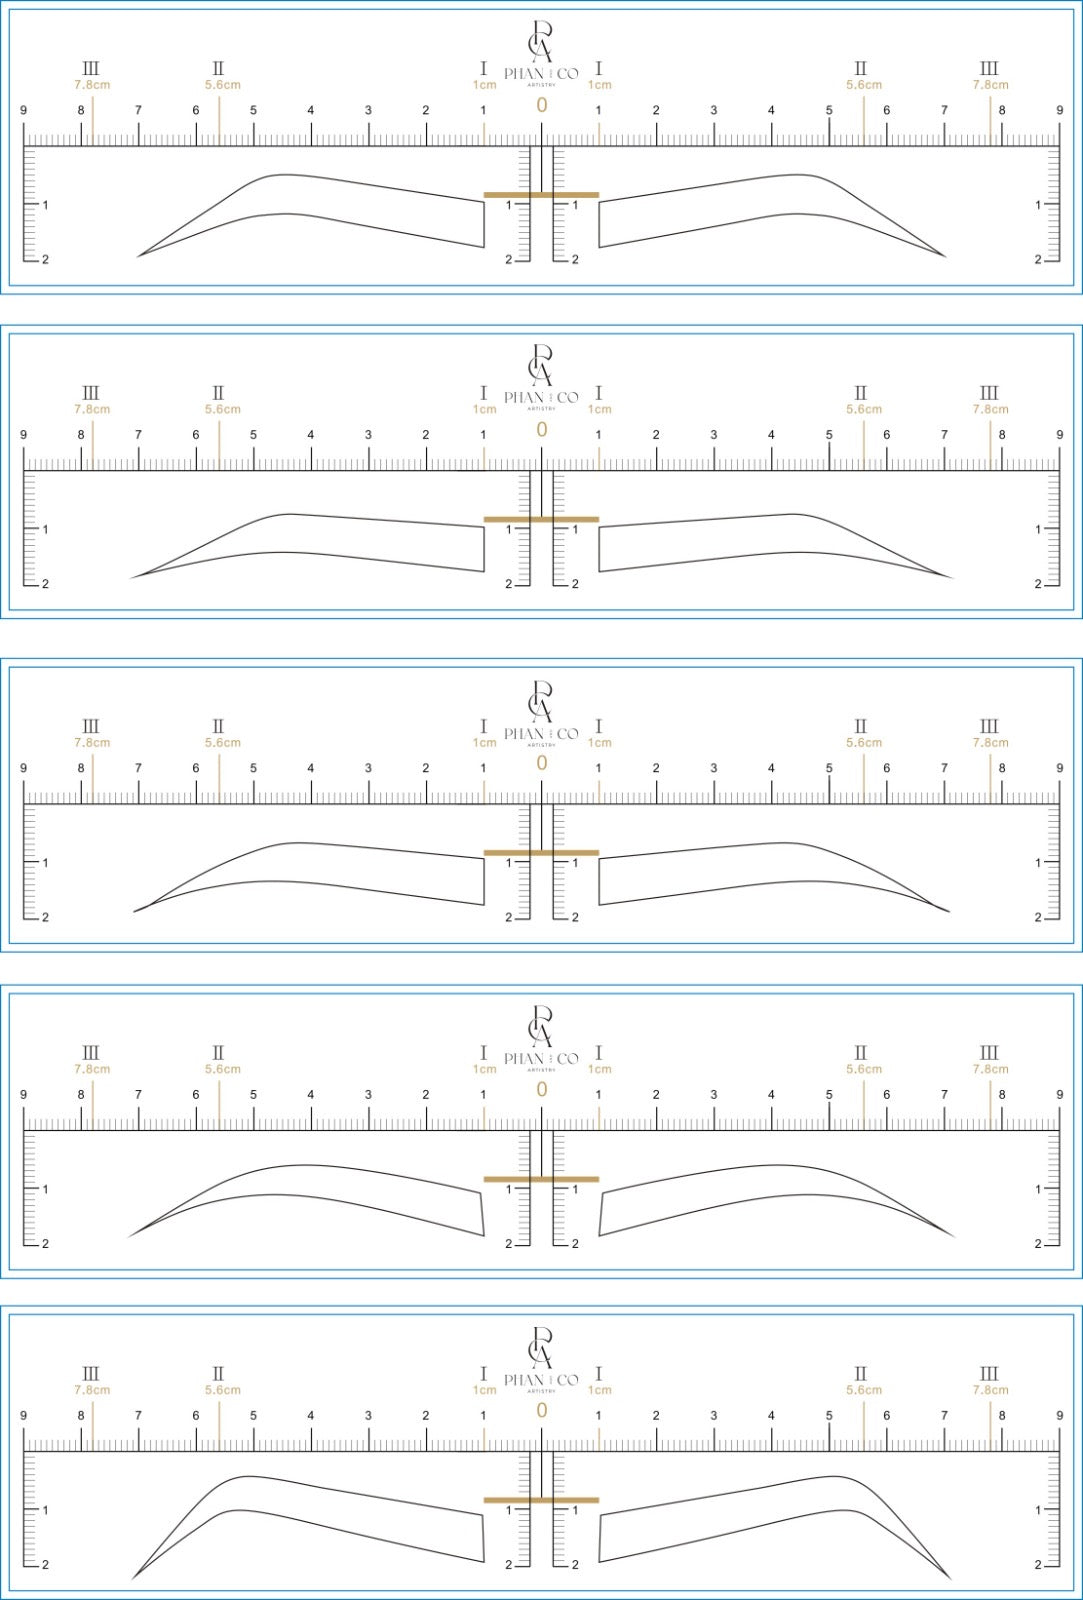
BROW STENCILS - 7 shapes (each order comes with 35 stencils)
BROW STENCILS - 7 shapes (each order comes with 35 stencils)
Couldn't load pickup availability
Say hello to salon-quality results in the comfort of your own space. Our easy-to-use brow stencil stickers simplifies the brow shaping and tinting process, making it accessible to everyone, regardless of experience level!
Tinting your brows at home with our brow stencil stickers is a game-changer for your beauty routine! Our 5 specially designed stencils ensures symmetry and shape, making it effortless to achieve salon-quality results in the comfort of your own home. Say goodbye to daily brow maintenance and hello to defined, long-lasting brows that enhance your natural beauty. Take control of your look and experience the convenience and confidence of perfectly tinted brows with our innovative brow stencils!
-HOW TO APPLY THE BROW STENCILS-
Applying brow stencils is a simple process that can help you achieve perfectly shaped brows every time. Here's a step-by-step guide on how to use brow stencils effectively:
1. **Choose the Right Stencil**: Select a brow stencil that matches the shape and size of the brows you want to achieve. There are various stencil shapes available, so pick one that complements your natural brow shape and desired look.
2. **Cleanse and Prep**: Start by cleansing your face to ensure your skin is free of oils and makeup. Apply our brow primer, this will help the stencil adhere properly and prevent any smudging during application.
3. **Position the Stencil**: Align the stencil with your natural brow shape, ensuring that it sits symmetrically ( as best as you can, brows are not twins!) on both sides. You can use the markings on the stencil to guide you in positioning it correctly.
4. **Secure the Stencil**: Hold the stencil firmly in place with one hand while using the other hand to apply tint within the cutout area of the stencil. Make sure the stencil remains steady to avoid smudges.
5. **Fill in the Brows**: Use a brush to apply the tint to fill in the brow area inside the stencil. Start with less product and slowly build it up. Be sure to follow the stencil's shape for a precise finish.
6. **Blend and Refine**: Once you've filled in the brows, gently blend the product using a brush to soften any harsh lines and create a more natural look.
7. **Repeat for the Other Brow**: Remove the stencil carefully and repeat the process on the other brow to ensure both brows are symmetrical and well-defined.
8. **Final Touches**: Once both brows are filled in, make any final adjustments to ensure they match and look balanced. You can use a concealer to clean up the edges and define the brow shape further.
By following these steps, you can easily apply brow stencils to achieve professional-looking brows at home. Experiment with different stencil shapes and techniques to find the perfect style that complements your features and enhances your overall look.
ALL SALES FINAL
Share


